Support for Rewrites and Redirects on SharePoint

If you use Microsoft SharePoint versions 2007, 2010 or 2013 and also use URL Rewriting techniques, you should review this Microsoft Knowledge Base article:

Supportability of Rewrite and Redirects with SharePoint 2007/2010/2013

According to the article, if you change the path of the URL (the part after the domain, e.g. /pages/home.aspx) received by IIS and send a different one to SharePoint (called asymmetrical URL rewriting in the article) you are unsupported.

If you send the same path of the URL received by IIS to SharePoint, then you run a supported scenario.


Why is it important? – you might ask.

It is important because when you run into issues on your implementation and you don’t find a good solution “googling” around, you might have to call Microsoft for support and their answer for you might be: “you’re running an unsupported scenario.”.

In my case, we ran into issues with AXD files not being sent to the browser by SharePoint and the issue looks to be related to both the URL rewriting and the output cache. for now we disabled the output cache as a workaround and it seems to working fine. Let’s see if we can find a good solution for this issue. I’ll probably write more about it here when we figure it out.

If you use any type of URL rewriting on SharePoint or are planning on doing it, you should this article out.


See you,

Amadeu.


How to Recycle an IIS Application Pool Using a Command Line

Use the following command line in order to recycle an application pool on IIS 7:

[system drive]:\windows\system32\inetsrv\appcmd recycle apppools /apppool.name:”Your Application Pool Name”


Works like a charm.


See you,

Amadeu.

How to Schedule a Powershell Script to Run on Windows 2008

It is a little bit tricky to configure a Powershell  script to run on the task scheduler on Windows 2008.

The separation between the powershell.exe command and the arguments makes a little confusion.

The way I did it was:

  • Create a new task.
  • Define a schedule.
  • Add an action:
    • Program/script: Powershell
    • Add arguments: -command &{E:\scripts\ClearIISLogs.ps1}

Now you just need to run your script and make sure it works as expected.


See you,

Amadeu.

URL Rewriting – Part 2: Outbound Rule

In this series of posts I’m going through the URL Rewriting process using the IIS URL Rewrite feature.

Check the other posts:
URL Rewriting – Part 1: The Basics


On the previous post we installed the feature and configured an inbound rule, which basically is a friendly URL when requests come from the browser to IIS. In this post we are going to talk about other rule templates available on the IIS URL Rewrite. One of the rules we are going to see is the outbound rule which is when we process elements on the returning HTML to be set to the browser and transform URLs into friendly URLs.


Outbound Rules

Outbound rules control the way links should be rendered when IIS sends HTML back to the browsers after processing the requested page. It can be used to enforce SEO links on your site (friendly URLs) and handle business rules.


Outbound Blank Rule

Go to IIS Manager. Select your site.

In the URL Rewrite screen, click on “Add Rule(s)…” link on the Actions panel.


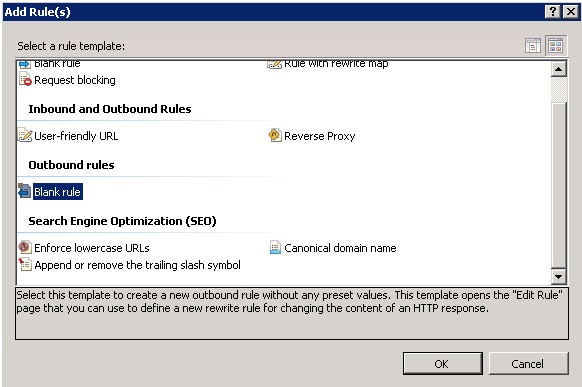
Select the Outbound Blank rule template.

When creating a rule you need to define:

  • Name: rule name.
  • Pre-Condition: the pre-condition defines if the outbound rule should be applied to the response IIS is sending to the browser. You can use different fields of the response to check on your pre-condition.

The pre-conditions can be reused between different rules.

  • Name: pre-condition name.
  • Using:
    • Regular expression: defines Regex as the parser for the expression defined on the pattern field.
    • Wildcards: defines the wildcards parser as the parser for the expression defined on the pattern field.
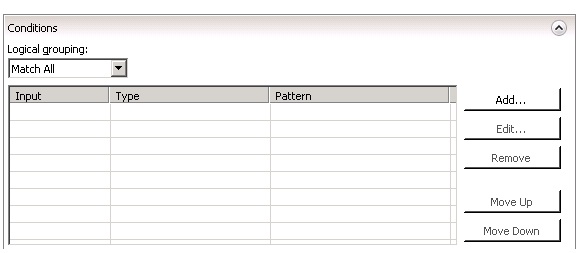
    • Logical grouping:
      • Match all: all conditions need to apply for the outbound rule to be applied.
      • Match any: if one condition applies the outbound rule is applied.
    • Conditions:

  • Condition input: HTTP header field to be checked. Examples: it can be the content type ({RESPONSE_CONTENT_TYPE}) or the response status ({RESPONSE_STATUS}).
  • Check if input string:
    • Matches the pattern.
    • Does not match the pattern.
    • Pattern: the pattern to be tested.
    • Ignore case: ignores cases when applying the pattern. It is a good setting to be left checked if you do lots of regular expression.
  • Match
    • Matching scope: defines if the outbound rule should be applied to the response header (server variables) or to the response body (response).
      • Response
      • Server variable
    • Match the content within: tags and attributes to apply the rewrite when processing the return HTML content.
    • Custom tags: specify your custom tags contained on the return HTML.
    • Content:
      • Matches the pattern.
      • Does Not Match the Pattern.
    • Using:
      • Regular Expressions: looks for a regular expression on the selected tags properties.
      • Wildcards: looks for a wildcard expression on the selected tags properties.
      • Exact Match: looks for a exact match on the selected tags properties.
    • Pattern: expression to be matched based on the type of expression selected on the Using field.
    • Ignore Case: ignores cases when applying the pattern. It is a good setting to be left checked if you do lots of regular expression.
  • Conditions
    • They are the same as pre-conditions but cannot be reused between outbound rules.
  • Action
  • Action Type:
    • Rewrite: applies the regular expression to the links found on the return HTML.
    • None: doesn’t execute any operation on the request, just closes it.
  • Stop processing of subsequent rules: stops the processing if the rule is applied.


Example of an Outbound Rule

This example rule is intended to modify links pointing to the product.aspx page rewrote to the /products/[product id]/[product name] format.

Here is the rule configuration:

This is the HTML code for my home page with the links to the products:

This is the returned HTML I can see on my browser:

This is how the page looks like. The rewrite feature has no effects on the page itself.

References about this topic can be found at  IIS.net.


Complexity of Regex

If you look at the outbound rule example you might find very complex to write Regex. Normally it is not very easy to write it if you’re not used with its syntax and it can lead you to make several mistakes and have problems debugging it.


If there is a tip I can give you it is: test it outside IIS and your web pages before trying to debug it in any other tool or way. A good, simple and free (some of the features are free) way to do it is using the Regex Hero web site. It has a nice UI and several features to allow you understand how the matches happen.


Conclusions

At this point we know how to create basic inbound and outbound rules in IIS using the IIS Rewrite module. This way we can make entire sites look friendlier for end users changing its URLs to have a more meaningful appearance. On the next articles we will look on how to create custom providers to have rules created outside of IIS and how to integrate the IIS Rewrite to SharePoint 2010.


See you,

Amadeu.

Set IIS Redirect Settings using Powershell

Hi.

Today I had to change the redirect setting on IIS for a site and before it has been a kind of painful process.

I don’t like doing things manually because it is very error prone and mainly when I’m dealing with Production servers errors are not very welcome.

This powershell script can change these settings for you:

import-module webAdministration

$siteName = "Your Site"
$redirectPage = "http://yourredirectpage.com/destination.aspx"

# Set the redirect
Set-WebConfiguration system.webServer/httpRedirect "IIS:\sites\$siteName" -Value @{enabled="true";destination="$redirectPage";exactDestination="true";httpResponseStatus="Found"}

In order to disable redirect you can use this script:

<pre>import-module webAdministration

$siteName = "Your Site"
$redirectPage = "http://yourredirectpage.com/destination.aspx"

# Disable the redirect
Set-WebConfiguration system.webServer/httpRedirect "IIS:\sites\$siteName" -Value @{enabled="false"}

You can get the script file here.

See you.

URL Rewriting – Part 1: The Basics

Sometime ago I’ve been asked to deliver a rewrite/redirect engine solution for a project. I started researching, got some tips from my boss and found a few IIS/.NET solutions to do this kind of operation: IIS URL Rewrite ModuleURLRewriter.Net and URLRewriting.Net.

Doing this task I realized there is not much information about URL rewriting in general and even less articles about using it with SharePoint 2010. I then decided to write a series of articles on how to use it, how to configure it on IIS and apply the URL rewrite concept to SharePoint 2010.


What is URL Rewriting?

URL Rewriting is the operation of change the external URLs for a web site in order to allow it to have more meaningful and search friendly URLs. It can make your site easier to use and also make it more appropriate (or friendly) for the search robots crawling it.

As more web sites become dynamic and data driven, some of them expose really confusing URLs for either people to memorize and understand or for search robots to analyze. URL Rewriting can help sole this problem allowing site admins to expose URLs that actually represent the page’s content.


Here some examples of hard to remember and understand URLs:

https://myspworld.wordpress.com/post.php?post-424&action=view

http://www.google.com/search?sugexp=chrome,mod=9&sourceid=chrome&ie=UTF-8&q=url+rewriting

http://yourwebsite.com/products.aspx?prodid=62


Here are some examples of friendly URL:

https://myspworld.wordpress.com/2012/05/28/url-rewriting-part-1-the-basics

http://en.wikipedia.org/wiki/Rewrite_engine

http://yourwebsite.com/books/sharepoint-2010


Which URLs would you prefer to have on your web site?


URL Rewriting can be done in two ways: rewrite or redirect.

On the rewrite operation we have the actual meaning on the URL rewriting. We are hiding our internal complex URL and exposing a friendly URL. When the friendly URL is requested we translate it to our internal URL (full of parameters and numbers nobody but our site would understand) and execute it. The user’s browser will receive the returned HTML with the friendly URL.

On the redirect operation we expose a friendly URL but instead of executing our internal URL and keeping the friendly URL for the user’s browser, the user is redirected to a different URL, a friendly or not so friendly one, depending on how we configure the redirect.

On the browser’s level the difference between rewrites and redirects is how the URL will be displayed. On the rewrite, the browser will keep the friendly URL all the time. On the redirect, IIS will send a HTTP request for a new URL back to the browser, the browser will request the new URL and the browser’s address bar will be updated with the new URL. The user will definitely notice that the URL has changed.


As an example of rewrite we could have:

-The user types an url on the browser: http://yoursite.com/oldurl.

-The redirect engine detects that this URL should be changed to newurl.

-The redirect engine makes an IIS call to new url  http://yoursite.com/newurl and send its HTML output back to the browser.

-On the browser’s address bar the user will still see the old url: http://yoursite.com/oldurl.


As an example of redirect we could have:

-The user types an url on the browser: http://yoursite.com/oldurl.

-The redirect engine detects that this URL should be changed to newurl.

-IIS will send a HTTP request asking the user’s browser to go to  http://yoursite.com/newurl.

-The browser will request the new url and update its address bar.


IIS URL Rewrite 2.0

Analyzing a few solutions for this URL Rewriting, the one I liked better was the IIS URL Rewrite 2.0. In my case it made more sense since the run SharePoint 2010 and IIS 7 and it would be easily integrated with these technologies.

The URL Rewrite is an IIS 7 feature which allows you to process inbound and outbound URLs and redirect or rewrite it according to rules. The rules can be hard-coded, use wildcards or can even be regular expressions (I really enjoy using REGEX even though it is not that easy to create or maintain the expressions).


For more references on the IIS URL Rewrite check these links out:

URL Rewrite 2.0: http://www.iis.net/download/urlrewrite

URL Rewrite Extensibility Samples: http://download.microsoft.com/download/3/9/E/39E30671-7AD2-4902-B56B-C300D862595E/RewriteExtensibility.msi

Using Custom Rewrite Providers: http://learn.iis.net/page.aspx/803/using-custom-rewrite-providers-with-url-rewrite-module/

Developing a Custom Rewrite Provider: http://learn.iis.net/page.aspx/804/developing-a-custom-rewrite-provider-for-url-rewrite-module/


Installing

The installation is very simple. You just need to download the installer and run it.

Get the 32-bit installer or the 64-bit installer.

After it is installed, open IIS Manager and check a new icon on the web site’s features.


Using the URL Rewrite

When you click on the URL Rewrite icon on the web site’s features, it will take you to the URL Rewrite rules screen. It should be an empty screen since we don’t have any rule configured. Rules are the definitions telling IIS how to handle the URLs. Basically, we can have inbound rules and outbound rules. Inbound rules are applied when the requests come to IIS and outbound rules are applied before IIS sends HTML back to users’ browsers.

It is now time to add rules and start with URL rewriting.


Inbound Blank Rules

On the URL Rewrite screen, click on “Add Rule(s)…” link on the Actions panel.

Select the Inbound Blank rule template.

When creating a rule you need to define:
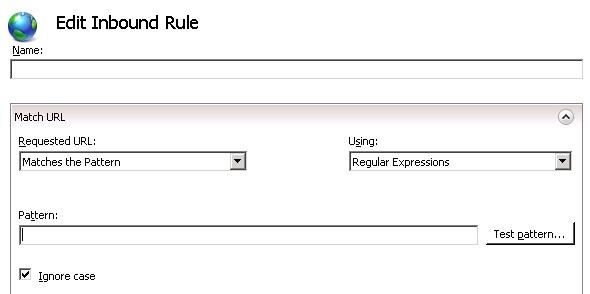
  • Name: rule name.
  • Match URL: defines the rules for matching URLs and applies your rule.
    • Requested URL:
      • Matches the pattern: your rule is applied if the requested URL matches the pattern.
      • Doesn’t match the pattern: your rule is applied if the requested URL doesn’t match the pattern.
    • Using:
      • Regular expressions: defines Regex as the parser for the expression defined on the pattern field.
      •  Wildcards: defines the wildcards parser as the parser for the expression defined on the pattern field.
      • Exact match: defines the URL should match exactly what is on the pattern field.
    • Pattern: defines the pattern to be searched on the URLs.
    • Ignore case: defines if your rule ignores case on the matching test. That is a important field to be selected since you have no idea on how users might type URLs.
    • Conditions:

      • Defines conditions based on the HTTP request for the rule.
      • Logical grouping:
        • Match all: requires all matches to continue processing the rule.
        • Match any: one match is enough to continue processing the rule.
      • New Condition:
        • Condition input: request variable.
        • Check if the input string: has option on how to match the input string.
        • Pattern: can be a regular or wildcard expression.
    • Server Variables

      • Allows the rule to change values of server variables.
      • Set server Variable:
        • Server variable name: variable name.
        • Value: new value.
        • Replace existing value: allows the value to be replaced if it already exists.
    • Action:

    Action types available: rewrite, none, redirect, custom response and abort request.

    Rewrite

    Defines that your rule will rewrite the URL and execute it but the URL on the user’s browser will continue the same. This execution will be transparent for the user.

    • Action Properties:
      • Rewrite URL: URL to execute instead of the original one.
        • Offers tags to be used as dynamic part of the rewrite URL:
          • {R:0}: returns the whole input expression.
          • {R:1}: returns the first part of the input URL contained in parenthesis.
          • {R:N}: returns the N part of the input URL contained in parenthesis.
      • Append query string: appends to original query string to the new URL.
      • Log rewritten URL: logs rewritten URLs to IIS log files instead of logging the URLs request by the browser.
    • Stop processing of subsequent rules: the rules are processed in the order they appear on the Rewrite Rules screen. When selecting this option your rule will abandon the processing of the following rules if this rule is applied. This normally is how you want to configure it.

    None

    No action should be taken. This is an odd option to be seem here since we can disable the rule.

    Redirect
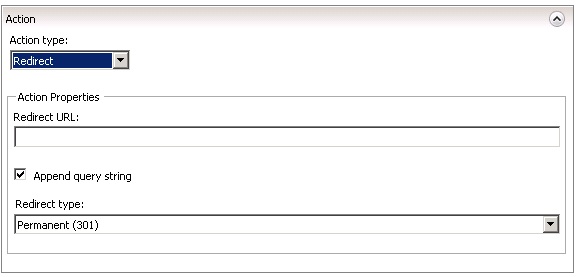
    Defines that your rule will rewrite the URL and send the new URL back to the user’s browser. The user will notice the URL has changed and a new request will be made to IIS to process the new URL.

    • Action Properties:
      • Redirect URL: URL to redirect the browser to.
        • Offers tags to be used as dynamic part of the redirect URL:
          • {R:0}: returns the whole input expression.
          • {R:1}: returns the first part of the input URL contained in parenthesis.
          • {R:N}: returns the N part of the input URL contained in parenthesis.
      • Append query string: appends to original query string to the new URL.
      • Redirect Type:
        • Permanent (301): Redirects the browser to the new URL and tells the browser to cache it.
        • Found (302): Temporary redirect. The browser doesn’t cache it.
        • See other (303): Redirect for application using POST HTTP method.
        • Temporary (307): Also a temporary redirect introduced on HTTP 1.1. Requires the request to be repeated to be executed.

    Custom Response

    Creates a custom HTTP response to the browser with a status code defined by the rule.

    • Action properties:
      • Status code: status code number.
      • Substatus code: substatus code number.
      • Reason: string with the reason.
      • Error description: string with the error description for the response’s body.

    Abort Request

    Aborts the request and drops the HTTP connection.


    Example of an Inbound Rule

    In our example we are going to setup a regular expression rule to rewrite the friendly URL /products/45/sharepoint-book to our actual application URL /products.aspx?id=45&name=sharepoint-book.

    Basically we are creating a rule to get any URL composed by products/[a sequence of any characters]/[a second sequence of any  characters] and rewrite it as product.aspx?id=[first sequence of characters]&name=[second sequence of characters].


    Testing the example

    The product.aspx page code is very simple and just shows the two query strings ID and Name.

    The test it, first we accessed the regular URL using the parameters in the querystring.


    Then we tested our rewrite rule:


    It worked just fine. Behind the curtains IIS got the friendly URL /prodcuts/45/sharepoint-books and execute the URL /product.aspx?id=45&name=sharepoint-books.


    IIS UI versus Web.config

    All the options you configure on the IIS user interface actually are written on the web.config file.

    If you fill more comfortable going to the web.config file you can configure all of your rule there. It is also a much simpler way to copy the settings to move to a different server.

    All the settings are under configuration/system.webServer/rewrite node.

    Follow the web.config snippet for the inbound rule we created:


    On the next article I will write about outbound and user-friendly URL rules.


    See you,

    Amadeu.

Interesting Article on XsltListViewWebPart Performance

Jaap Vosser wrote a very interesting and explanatory article on the XlstListViewWebPart performance:

How the XsltListViewWebPart in SharePoint 2010 can be a real performance killer

It gives us good reasons to pay more attention to the use of this web part, how it affects the page’s performance when you have more than a web front-end.

Have a good reading!!!


See you,

Amadeu.

FAST Static Ranking

FAST has two ways of updating the ranking statistics of the documents. One is the static ranking and the other one is the dynamic ranking. The static ranking is done at crawling time, during the pipeline processing and it is going to be the same for one document on all queries executed on FAST. The dynamic ranking is done at query time using XRANK expressions based on the search terms and also on custom defined rules.

To update the ranking using the static approach you need to:

  • Add a custom relevancy field to your data source.
  • Create a new pipeline stage to update the ranking initial value.
  • Add the new pipeline stage to a pipeline.
  • Run the crawler for your data source.
  • Execute a query to test the results ranking.

Add a custom field to your data source

This field should represent the weight to be updated on the relevancy. There are several ways to calculate how a document is relevant to your usage profile. The most common way is to monitor the queries executed and the results clicked by the users and execute statistics bases on this data. Unfortunately FAST doesn’t provide an out-of-the-box way to get this type of data and update the ranking statistics. The only feature FAST ESP + Impulse provides to get data from the queries is through the Impulse Reporting feature but it doesn’t provide click tracking, only search result statistics.

Create a new pipeline stage to update the ranking initial value

To create a new pipeline stage you will need 2 files: a Python code file and a XML configuration file. This pipeline stage needs to use your custom field (customrankboost in this example) and change the value of the hwboost field. The default value for the hwboost field is 500,000. The idea is to use the custom field to apply a boost or a penalty to the hwboost field.

Examples of the files:

-Python code file.

In this code customrankboost field value is added to the hwboost field. Your implementation can do whatever you need to update the ranking initial value.

The Python file has a PY extension and should to be placed on the [FAST Root]\esp\lib\python2.3\processors\ folder.

-A XML pipeline configuration file.

The XML file should be place on the [FAST Root]\esp\etc\processors\ folder.

Add the new pipeline stage to a pipeline

After the files are in place, restart the proc_servers processes running on the FAST box and the stage will be available to be added to a FAST ESP pipeline.

Go to the FAST ESP Admin web site.

Go to the Document Processing tab and check if your pipeline stage is available.

On the Document Processing tab, edit a pipeline and add your custom stage to it.

Now your pipeline is ready to process the custom ranking field and change the initial ranking value for your documents.

Run the crawler for your data source

Make sure your custom field on your data source is filled in and run the crawler to call your pipeline with the custom ranking stage.

Execute a query to test the results ranking

After the crawl is done and the documents have been processed, execute a query and test the ranking. You should notice a change on the ranking field on the results for the documents affected by your custom field on the data source.

See you,

Amadeu.